
https://help.myob.com/wiki/x/Xwz0Ag
How satisfied are you with our online help?*
Just these help pages, not phone support or the product itself
Why did you give this rating?
Anything else you want to tell us about the help?
The Documents page lets you upload and securely store all your important documents and email messages in one place, online in MYOB Practice. Use smart features to quickly find and use documents and emails when you're working in other areas of MYOB Practice.
To make full use of these features, ensure your administrator's set up documents within MYOB Practice.
To open the Documents page, click the Clients icon (![]() ) on the left menu bar, and click Documents on the top menu bar.
) on the left menu bar, and click Documents on the top menu bar.

![]()
| Icon | Description |
|---|---|
| Indicates a document group. There are a couple of different ways to group documents:
|
| The entry in the list is a document. |
| The entry in the list is an email. |
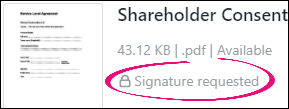
| The document has a task to sign off with a signature. |
| The document is shared to the portal. |

To open the document drawer, click anywhere in the list other than the Name link.
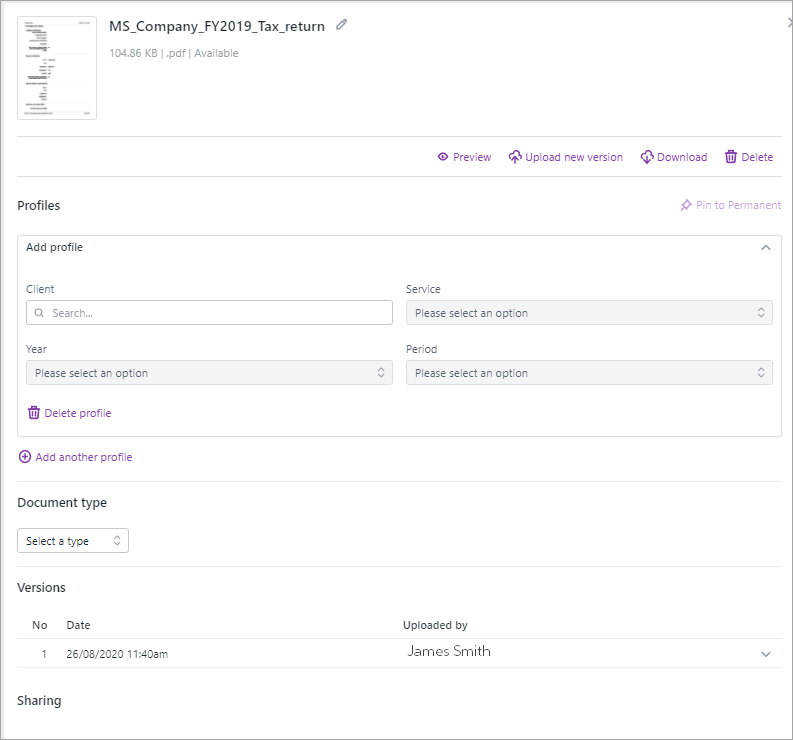
| Label | Description |
|---|---|
| Document name | Displays see the file size, format and name. You can edit the name right here. You'll also see the upload status, either Not available, In Progress or Available. |
| Preview | Click to see a full preview. All file formats are displayed as a PDF in the preview for easy access on all devices. |
| Upload new version |
|
| Download | Download a copy of the document. |
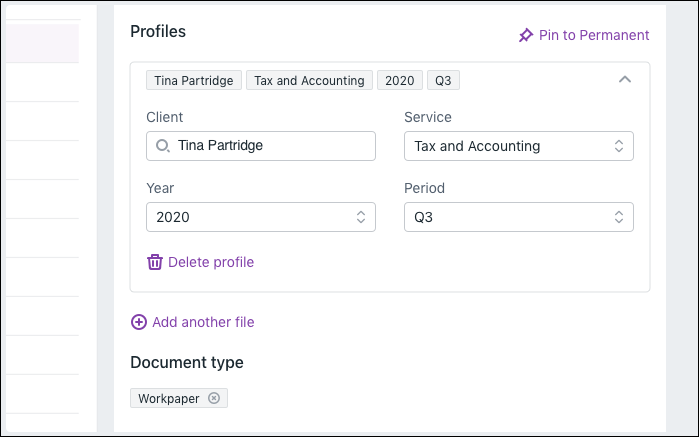
| Profiles | One of the handiest features of using document in MYOB Practice is the ability to add document profiles. Add and edit profiles. If you add a new profile, you have the option to add a different client so that the same document applies to multiple clients. Add identifiers to help categorise your documents. Profile the documents by client, year, service and period, to organise and quickly find the right documents for different work. You can use these profile details when searching and filtering.
|
| Document type |
|
| Versions | To tell the difference between two versions of the same document, see the date and time in the version history. Click the expand icon ( |
| Sharing | See who the document was shared with when the document was published to portal, and if the document is part of any tasks |


To ensure documents within MYOB Practice are as secure as possible, there are some restrictions to what file formats you can upload. But there are still plenty of file formats you can use!
Supported file formats in MYOB Practice
- .aba,
- .bmp,
- .cgm, .cmx, .csv,
- .dicom, .djvu, .dng, .doc, .docm, .docx, .dot, .dotm, .dotx,
- .emf, .eml, .epub, .eps,
- .gif,
- .html,
- .jpeg, .jpg, .jp2,
- .mht, .mhtml, .mobi, mpp, mpt, mpx, .msg, .myo,
- .odg, .odp, .ods, .odt, .one, .onetoc2, .otp, .ott,
- .pcl, .pdf, .png, .potm, .potx, .pps, .ppsm, .ppsx, .ppt, .pptm, .pptx, .ps, .psd,
- .qif,
- .rtf,
- .svg,
- .tex, .tiff, .tif, .tsv, .txt,
- .vdw, .vdx, vsd, .vsdm, .vsdx, .vssm, .vss, .vssx, .vst, .vstm, .vstx, .vsx, .vtx,
- .webp, .wmf,
- .xls, .xlsb, .xlsx, .xml, .xps, .xslfo,
- .zip.
Documents that you want to upload, including emails, must be saved to your computer first.
- Click the Clients icon (
 ) on the left menu bar, and click All clients or select a specific client.
 - Click Documents on the top menu bar and select Upload new document.
- Drag and drop the document.
- Click Upload files and select the document you want to upload.
The document is immediately virus scanned and uploaded.
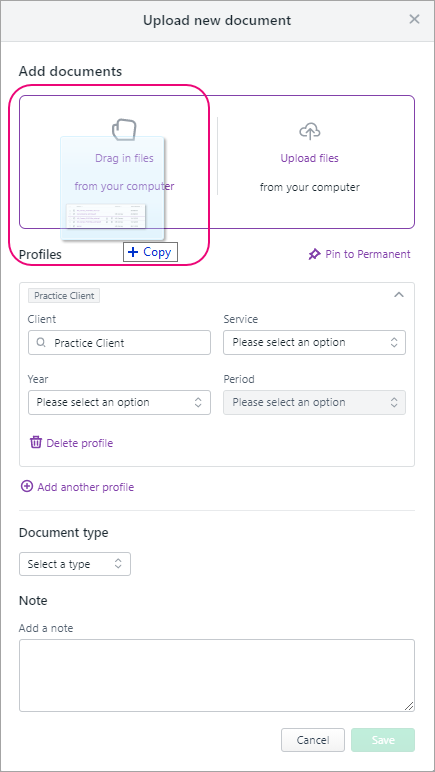
- Complete the following fields if required:
- Profiles: Categorise your document.
- Document type: Select the type of document
- If you want to pin the documents to a special Permanent documents group, click Pin to Permanent.
- Complete any Notes for the document.
Click Save.
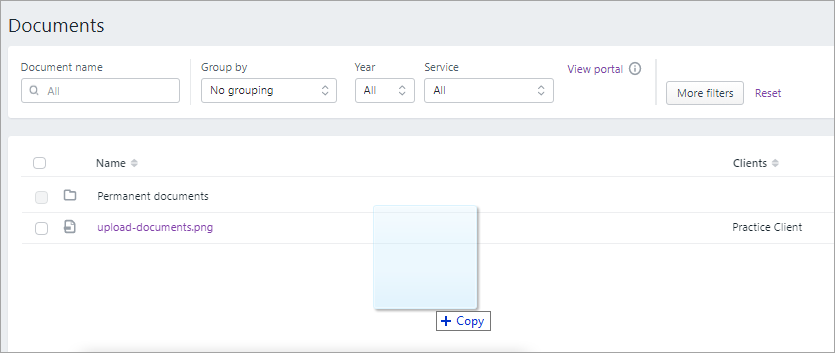
You can also directly drag and drop the document with the client's Documents page.
Uploading a new version lets you keep the version history of the old document.
- Click anywhere in the list other than the Name link. The document drawer opens.
- Click Upload a new version.

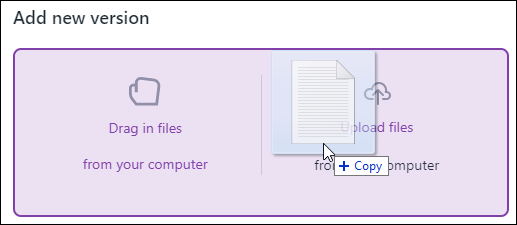
- Upload the document. There are a couple of ways you can do this:
- Click Upload files and open the file from your file explorer.
- Open your file explorer outside of MYOB Practice and drag the document onto the Add new version area.
- Optionally, add a note.
- Click Save.
This is a good way to merge, for example, multiple travel expenses receipts into one PDF.
There's currently no way to change the order that merged documents appear in a PDF.
- On the Documents page, select the checkbox to the left of one or more documents in the document list. Additional options appear above the list.
- Click Create PDF.
- If you selected:
- one document, the PDF is created.
- multiple documents, the Create PDF window appears:
- If you want each document that you selected to be an individual PDF, select Do not consolidate, save each document separately and click Continue. The PDFs are created.
- If you want to merge the documents into one PDF, select Consolidate documents into a single PDF file, complete the additional options and click Continue.
- Refresh the Documents list to see the PDFs in the list.
When you select documents, they must be either less than 150 files or the total size of the files is 100 MB or less.
To unshare a document
Want to delete a document that's been shared through the portal or used as part of a task? You need to stop sharing the document first by removing the document from the Sharing section of the document drawer. This will remove it from the portal or contributor, and from any tasks that it's used in. When someone views a task that had a document removed, they'll see You can no longer access this document in place of the actual document.
See also Delete a task
- Click anywhere in the Documents list other than the Name link. The document drawer opens.
- In the Sharing section, click the remove (
 ) icon.
The Stop sharing document confirmation appears. - Click Stop sharing.
To delete or rename a document
If you delete a document, it's deleted completely from MYOB Practice. Ensure you download a copy of the document before deleting it.
You can't delete a document that has a status of Signature requested or Approved in the document drawer.
If the document's part of a task, delete the task and documents associated with the task (you'll be prompted to delete the associated documents while deleting the task) and then delete the document from MYOB Practice following the steps below.
- Click anywhere in the Documents list other than the Name link. The document drawer opens.
- If you want to:
- Rename a document, click the edit icon (
 ) and type the new name.
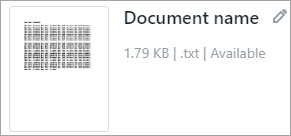
- Delete a document, click Delete.

- Rename a document, click the edit icon (
Searching
Use the search and filter options above the Documents list to quickly find the document you're looking for.

To see even more search options, like searching within an upload date range, or by who uploaded the document, click More filters
You have different search and filtering options when you have a specific client opened rather than all clients.
If you select a client who has a portal set up, you can click View portal to search for documents within the portal.

Viewing grouped documents
You can view the documents that have been grouped together in the group folder at the top of the document list. To view the grouped documents, open the Documents page for a client and click the group icon (
 ).
).There are a couple of different ways that documents may have been added to a group. Documents can be:
- pinned to a permanent group during upload
- grouped by a Group by filter option.

- To open the document, click the document name in the Name column.
To download one or more documents, select the checkbox to the left of each document in the Documents list and click Download above the list. If you download multiple documents, they'll be compressed and downloaded as ZIP file.
- To improve the performance of Documents within MYOB Practice, there are limits on the quantity and size of documents you can download in bulk. You can download 150 documents or 1 GB of documents, whichever one of these limits you reach first.
- To download documents from MYOB Practice, you may need to allow pop-ups in your browser for partner.myob.com. The browser will prompt you to do this if you haven't previously blocked pop-ups.
If you have blocked pop-ups, go to you browser's pop-up settings and add partner.myob.com as an exception to the pop-up block rules. For more information about changing your settings, see the help for your browser.
You'll find the documents in the folder your browser is configured to download to. Access them from your browser's downloaded documents function, or in your computer's download folder.
For more information on collaborating with clients, see:
- On the Documents page, select the checkbox to the left of a document in the document list. Additional options appear above the list.
- Click Publish to portal. The Publish to Secured Portal window appears.
Select whether a signature is required, whether you want to publish the document as a PDF, and whether you want to notify anyone.
If you select Signature required, the Publish as PDF option is automatically selected and cannot be deselected.
If a document doesn't need a signature, you can published it as a PDF or in its original file format.
You might want to deselect Publish as PDF, for example, if you'd like the person you're sharing the document with to be able to easily edit or copy values in the document.
- Click Next.
Complete any details based on your previous selections and click Publish and create task.
- If you chose to require a signature, you can see the task in the document drawer. To open the drawer, click the document in the Documents list anywhere other than the Name link.
- You’ll see the documents listed in the Documents page in MYOB Practice. You can tell that a document's been shared to the portal if it's got a shared (
 ) icon in the list of documents, or by clicking a document in the list and looking in the document drawer.
- You can stop the document from being shared through the portal by removing the document from the Sharing section of the document drawer. See the section on deleting, above.
-
Documents within MYOB Practice
-
Documents in Compliance - AU & NZ
-
Setting up documents profiling within MYOB Practice
-
Uploading and working with documents within MYOB Practice
-
Documents you can publish
-
Sending documents from AE or AO by publishing to portal
- Send documents for digital approval
-
Access documents published to the portal
-
Share a document
-
Documents (previous version)
-
Best practice for using MYOB Practice tax and Document Manager - NZ
-
Best practice for using MYOB Practice and Document Manager - AU
-
Documents in Compliance - AU & NZ
 Yes
Yes
 No
No
 Thanks for your feedback.