Australia only You can now set up streamlined and secure payments directly from AccountRight. Before you can use this service, there's a number of one-off steps you need to do. 1. Record your bank details| UI Expand |
|---|
| title | To record your bank account details |
|---|
| To record your bank account details- Go to the Accounts command centre and click Accounts List. The Accounts List window appears.
- Select the bank account (that is, an account with a Bank or Credit Card account type) that you want to use for electronic payments.
- Click Edit. The Account Information window appears.
- Click the Banking tab.
 Image Removed Image Removed Enter your bank account details in the fields. Copy this information exactly as it appears on your bank statement or chequebook. | UI Text Box |
|---|
| 10 digit bank account numbers In most cases where a bank account number is 10 digits long, the first character is a zero and this can be omitted in AccountRight. However we recommend you check this with your bank first to ensure it's OK to do this in your situation. |
Select I create Bank Files (ABA) for This Account and enter the electronic payment file (ABA file) details. | UI Text Box |
|---|
| Bank processing details required You may need to contact your bank for the following details. |
- Type the three-letter Bank Code that identifies your bank, for example, NAB, ANZ, CBA or WBC. Check with your bank if unsure.
- Type the Direct Entry User ID (sometimes called the APCA ID). This ID is assigned by your bank when you registered with them to process Direct Credits.
- If your bank file requires a self‑balancing transaction, select Include a Self-Balancing transaction.
- Click OK to return to the Accounts List window.
- Repeat from step 2 for each bank account you want to make electronic payments from.
| UI Text Box |
|---|
| Get paid faster Add a "How to pay" section to your invoices. |
|
| UI Text Box |
|---|
| Add your bank account details to your invoices Make it easier for your customers to pay via direct deposit by adding your bank details to your invoices. See Personalising invoices for details. |
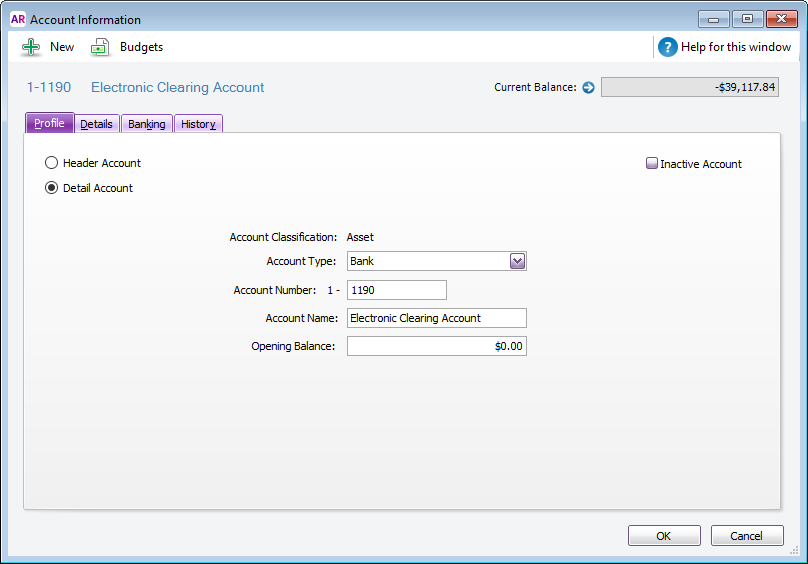
2. Set up an electronic clearing accountWhen you record a transaction you want to pay electronically, the transaction is posted to a temporary holding account. This type of holding account is called a clearing account or a suspense account. The payment sits in this account until you're ready to create a payment file to upload to your bank for processing. Check your accounts list for an account named ‘Electronic Clearing Account’ (Accounts command centre > Accounts List). Here's a sample of what an electronic clearing account looks like (from AccountRight's sample company file, Clearwater):  Image Removed Image Removed
If this account doesn’t exist in your company file, you need to create it (see Set up accounts) and then set this account as the linked (default) account for electronic payments. | UI Expand |
|---|
| expanded | true |
|---|
| title | To set the clearing account as your linked account for electronic payments |
|---|
| To set the clearing account as your linked account for electronic payments- Go to the Setup menu, choose Linked Accounts and then Accounts & Banking Accounts. The Accounts & Banking Linked Accounts window appears.
- In the Bank Account for Electronic Payments field, type or select the Electronic Clearing Account.
- Click OK.
|
3. Record the bank details of suppliers and employees| UI Expand |
|---|
| title | To record the bank details of a supplier |
|---|
| To record the bank details of a supplier- Go to the Card File command centre and click Cards List. The Cards List window appears.
- Locate the supplier you pay electronically and click Edit. The Card Information window appears.
- Click the Payment Details tab.
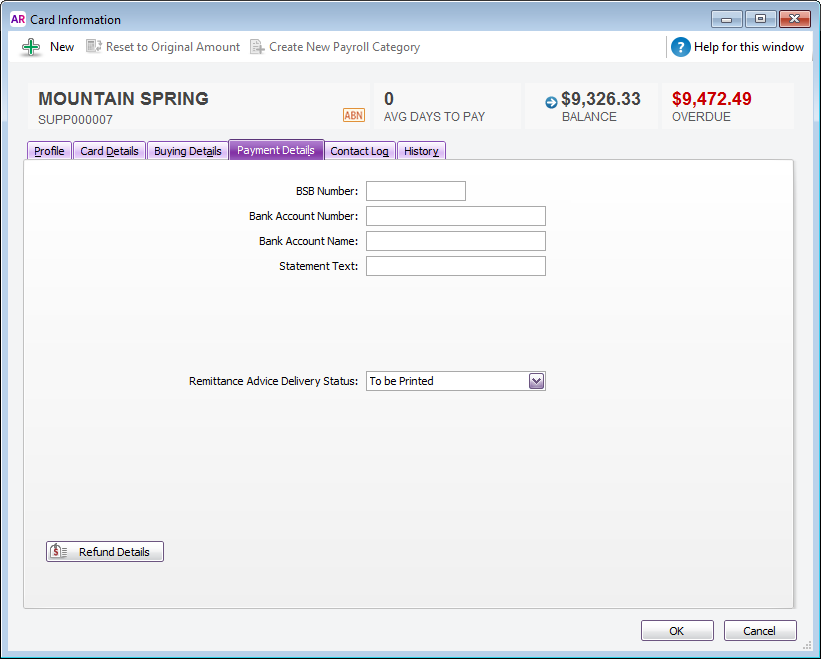
 Image Removed Image Removed - Enter the supplier’s bank account details.
- In the Statement Text field, type the text you want to appear on your supplier’s bank statements. For example, you may want the text ‘monthly rent’ to be shown on your real estate agent’s bank statement since this will be a recurring transaction each month.
- Select the Remittance Advice Delivery Status. If you choose an emailing option, confirm or enter the supplier's email address.
- (Not Basics) Click Refund Details and enter the payment method by which the supplier refunds you and click OK. The Card Information window appears.
- Click OK to return to the Cards List window.
- Repeat from step 2 for each supplier you pay electronically.
|
| UI Expand |
|---|
| title | To record the bank details of an employee |
|---|
| To record the bank details of an employee- Go to the Card File command centre and click Cards List. The Cards List window appears.
Locate the employee you pay electronically and click Edit. The Card Information window appears. | UI Text Box |
|---|
| | If you haven’t created a card for the employee, you can create one now by clicking New in the Cards List window and entering the employee’s details. |
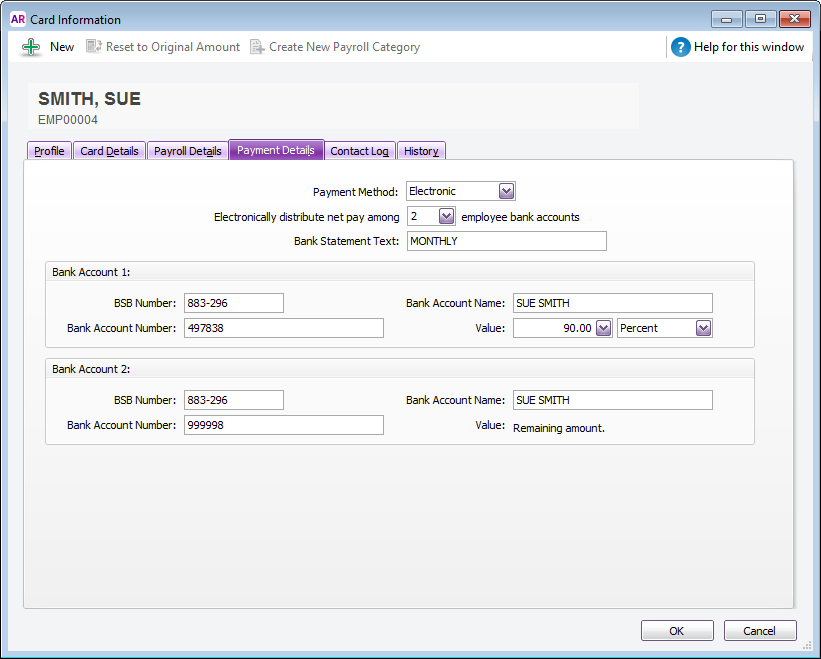
Click the Payment Details tab. Select Electronic from the Payment Method list. (Plus, Premier) Select the number of bank accounts (up to three) the employee wants their pay to be distributed to. Enter the employee’s bank account details. Type the statement text you want to appear on the employee’s bank statements, for example ‘monthly pay’. (Plus, Premier) If you're distributing to more than one account, in the Value field, type the amount or percentage of the pay to be deposited into the account and select the distribution method (Percent or Dollar). Note that the final account will receive the remaining amount of your employee's net pay.
 Image Removed Image Removed - Click OK to return to the Cards List window.
- Repeat from step 2 for each employee you pay electronically.
|
Introduce the new payments service Talk about how it's better than the old "bank file" method.(link back to the old topic if they prefer the old skool method) Mention the fees and charges Prerequisites Who can set up? Describe how to get started Step through the setup (AR > web page > download app > complete setup) What's next (link to new "making payments" topic) |