OK, let's get started personalising a form by opening the form you want to work with. - Go to the Setup menu and choose Customise Forms. The Customise Forms window appears.
- Click the tab corresponding to the type of form you want to customise.
 - Select a form group from the list to display a list of forms associated with that group. For example, select the Item group in the Invoices tab.
 - Click the form, then click Customise. The selected Form window appears.
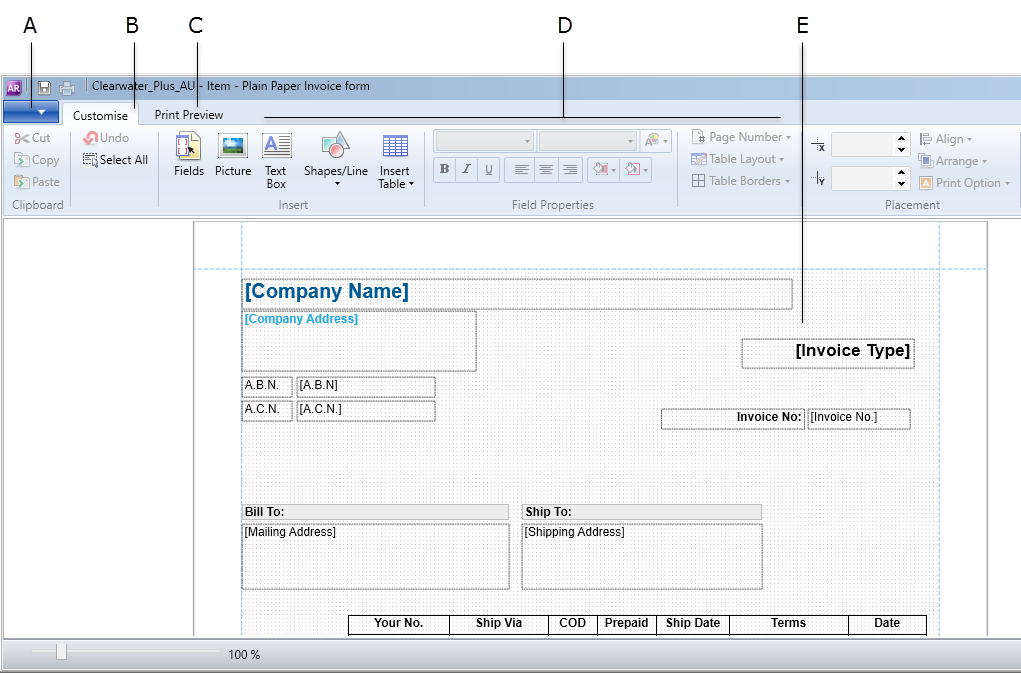
| A | File menu | View printing and saving options. | | B | Customise tab | This is the main tab for customising your form. You can add fields, format text and select table layouts. | | C | Print Preview | View your form as it will appear printed. Your form is instantly updated in this tab as you customise. | | D | Customise options | This area of the window is where you make selections for customising your form. | | E | Form body | Select and modify form elements in this section of the window. Select an element, then view the properties in the Customise tab. |
| UI Text Box |
|---|
| | Cheques have two parts A cheque form has two parts: the cheque itself and the stub. You customise the cheque and the stub separately. For more information, see Personalising cheques. |
After displaying the form, you can: | HTML |
|---|
<h2><i class="fa fa-comments"></i> Personalising forms FAQs</h2><br> |
| UI Expand |
|---|
| title | Can I create a new form from scratch? |
|---|
| No, you'll need to personalise an existing form. |
| 
 Yes
Yes
 No
No
 Thanks for your feedback.