Tables in forms contain transaction information such as line items or tax summary information. Different table options are available for each form type. Let's take a look at the details: | UI Expand |
|---|
| title | To add a table to a form |
|---|
| - Open the form you want to add a table to (Setup menu > Customise Forms > click the form > Customise).
- In the Customise tab, click Insert Table.
 - Choose the type of table you want to use from the list. The table appears on the form.
- Click the table then drag the red cross to move the table into position.

|
| UI Expand |
|---|
| Click once anywhere inside the table, then click on the red cross icon and drag it to a new position. 
Alternatively, you can enter placement coordinates in the Customise tab. 
|
| UI Expand |
|---|
| title | To add or remove table columns |
|---|
| - Right-click the table and choose Show/Hide Columns. The Show/Hide Columns window appears.
 - If you want to:
- add a column to your form, select it in the Available columns list and click Show.
- remove a column from your form, select it in the Columns in your table list and click Hide.
- Click OK. The columns are updated.
|
| UI Expand |
|---|
| title | To change column order in a table |
|---|
| Click and hold a column heading and drag it to a new position. 
|
| UI Expand |
|---|
| title | To change column width in a table |
|---|
| Click and drag the edge of a column heading left or right. 
| UI Text Box |
|---|
| Need to adjust the far-right column width? Narrow another column until you can see the edge of the right-hand column. Ensure that the Edit Table option is deselected (Customise tab > Table Layout > deselect Edit Table). Then adjust the right-hand column width and tidy up the other column widths as required. |
|
| UI Expand |
|---|
| title | To edit table borders and shading |
|---|
| - Double-click the column or column header.
- Click the Customise tab.
- To change the format or alignment of the text, edit the text format options.
- To add a background colour to a column, click the shape fill icon (
 ) and choose fill colour options. ) and choose fill colour options. - To change the table borders, click the table or column and change the border options.
- To show alternate rows as shaded in the table, click Table Layout, then choose Show Row Shading.
|
| UI Expand |
|---|
| title | To edit, hide or show column headers |
|---|
| - Double-click the column header text you want to change.
- Type the text you want to show as the column heading.
- To change the format or alignment of the text, use the text format options in the Customise tab.
- To show or hide column headers, right-click the table and select Show Column Headers.
|
| UI Text Box |
|---|
| What's the blue border? The dotted blue border around a table cell represents the cell margin. This helps to see where text will wrap within the cell. 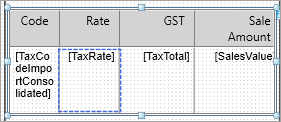
|
Don't forget to save your personalised form, so you can select it when printing or emailing. | 
 Yes
Yes
 No
No
 Thanks for your feedback.