Page tree

You are viewing an old version of this page. View the current version.

Compare with Current View Page History

« Previous Version 9 Next »


Close

How satisfied are you with our online help?*

Just these help pages, not phone support or the product itself

0
1
2
3
4
5
Very dissatisfied
Very satisfied

Why did you give this rating?

Anything else you want to tell us about the help?

Not available in AccountRight Basics

Categories enable you to track profitability of departments, offices, properties and other business segments.

When entering a transaction, you can allocate one category to it. You can then prepare a profit and loss statement for each category.

Categories can be assigned to the following transaction types:

  • spend money
  • receive money
  • transfer money
  • general journal entries
  • sales
  • purchases
  • build items
  • inventory transfers
  • inventory adjustments
  • payroll processing (Plus and Premier, Australia only)
  • pre-conversion sales and purchases.

You cannot allocate categories to some transactions

You cannot allocate a category to these transactions: Pay BillsReceive PaymentsPrepare Bank DepositSettle Returns and Credits/Debits and Pay/Receive Refunds. When entering these transactions, the categories assigned to the original transactions will be used. For example, the categories assigned to purchases appearing in the Pay Bills window will also be assigned to the payment.

To enable category tracking

To enable category tracking

  1. Go to the Setup menu and choose Preferences.

  2. Click the System tab.
  3. Select the Turn on Category Tracking option.
  4. If you want to make the selection of a category mandatory for all transactions, choose Required from the list.
To create a category

To create a category 

  1. Go to the Lists menu and choose Categories. The Categories List window appears.
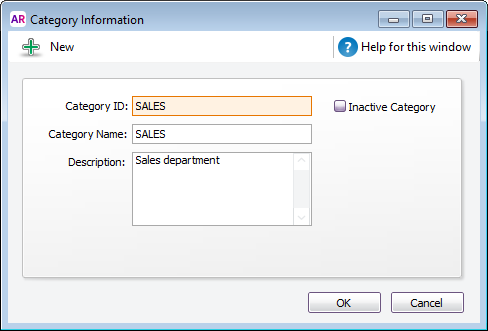
  2. Click New. The Category Information window appears.
  3. In the Category ID field, type a code that will be used to identify the category and press Tab.
  4. In the Category Name field, type the name of the category.
  5. In the Description field, type a description of the category or notes relating to the category.
    Category setup
  6. Click OK.