
- Created by ErikV, last modified by AdrianC on Dec 04, 2017
You are viewing an old version of this page. View the current version.
Compare with Current View Page History
« Previous Version 86 Next »
https://help.myob.com/wiki/x/-oFlAQ
How satisfied are you with our online help?*
Just these help pages, not phone support or the product itself
Why did you give this rating?
Anything else you want to tell us about the help?
AccountRight comes with a set of invoice form templates which are used when printing or emailing your sales. But it's easy to change these forms to create your own personalised invoices.
You can add your business logo and a 'how to pay' section, or make your invoices stand out with a splash of colour. It's up to you.
Here's an overview:
You can use one invoice form for all your sales or have separate forms for invoices, quotes and orders. You can also create different versions of an invoice form depending on what you're selling or who you're selling to.
OK, let's step you through it.
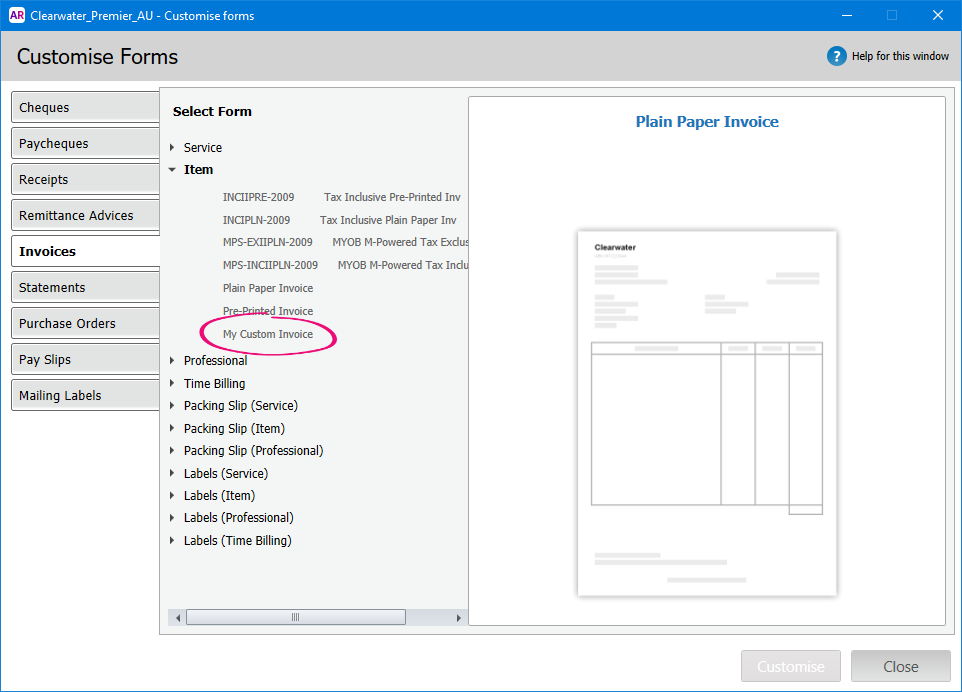
To customise an invoice
- Go to the Setup menu and choose Customise Forms. The Customise Forms window appears.
- Click the Invoices tab on the left.
- Select the form you want to customise then click Customise. The form opens, ready to be modified.
(click to enlarge)

Customise the form to suit your needs. For example, you can add a text box containing your bank details to let your customers know how to pay you by direct deposit.
Here's some guidance on other things you can do:If you want to See this topic add a business logo Add pictures and shapes to forms add text or fields Add text and fields to forms modify table columns Add tables to forms change the form size or background Set the form size and background modify the text, fields and images Editing form elements add a "how to pay" section (PayDirect Online, Australia only) Adding a 'How to pay' section to invoices To preview your form, click the Print Preview tab.
- When you've finished customising your form, go to the File menu and click Save As. The Save Form As window appears:
- Enter a name and a description for the form.
- Click Save then click OK to the confirmation message.
To close the form, go to the File menu and choose Exit. If prompted to save again, click No.
The Form window reappears. Your customised invoice will be listed.(click to enlarge)
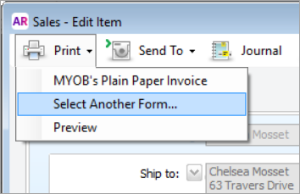
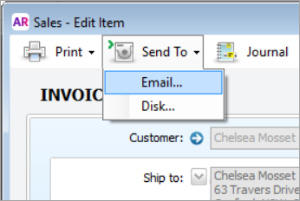
When you print or email an invoice, you can choose which form to use.
| If you are | Do this |
|---|---|
| printing an invoice when you record it |
|
| emailing an invoice when you record it |
|
| printing or emailing an invoice after you record it | Select the form you want to use via the Advanced Filters on the Print/Email Invoices window. For all the details, see Set the default forms to use when emailing or printing. |


If you have different invoice forms for different customers, you can set the default form to use in the customer's card. To set the default form to use for all customers, see Set the default forms to use when emailing or printing.
To set a customer's default form
- Go to the Card File command centre and click Cards List.
- Click the Customer tab.
- Click the zoom arrow to open the customer's card.
- Click the Selling Details tab.
- In the Printed Form field, select the customised invoice for this customer.

If you can't see your customised form, make sure the applicable Sale Layout is selected. - Click OK.
 Yes
Yes
 No
No
 Thanks for your feedback.