
- Created by JohnW, last modified by AdrianC on Oct 15, 2015
You are viewing an old version of this page. View the current version.
Compare with Current View Page History
« Previous Version 24 Next »
https://help.myob.com/wiki/x/9gWc
How satisfied are you with our online help?*
Just these help pages, not phone support or the product itself
Why did you give this rating?
Anything else you want to tell us about the help?
Need to add or change the personalised invoice form you use for all customers? Or want to add custom information to all suppliers? The easiest way to update details for all your cards at once is to export the data, update it in a spreadsheet (such as Microsoft Excel) and then import your changes.
Practice makes perfect! Updating your records in bulk requires you to know a little about the AccountRight import and export feature, and how to manipulate data in a spreadsheet. If you've never done this before, or you want to see what you can do, why not start by experimenting in a sample company? It's a safe place to play. To open a sample file, open AccountRight and select the Explore a sample company option from the Welcome window. A list of sample files (named Clearwater) appears. There's one for each AccountRight product.
The following video shows you how to bulk-update your stock items. The same approach can be taken to updating all your records, including customer and supplier cards. Watch this video to see how it's done.
Bulk updating remittance advice delivery method in supplier cards
AccountRight 2015.4 introduced the ability to set the remittance advice delivery method in a supplier's card. To bulk update this information, follow the steps below to export your supplier cards and the fields Co./Last Name, First Name and Remittance Method. Then update the Remittance Method for each supplier. See Set up AccountRight for emailing for more info.
- Open your company file.
- Go to the File menu and choose Import/Export Assistant. The Import and Export Assistant appears.
- Select Export data then click Next.
- In the Export field, select Cards from the drop-down list.

- Select the type of cards you want to export and click Next. The Format step appears.

- Leave the default format options and click Next. The Select Fields step appears. The fields in the left panel are the fields you can export.
Select the fields you want to export. You can export all fields (click Add All) or just those you want to change (select a field in the left panel and click Add). The selected field are added to the list of fields to be exported in the panel on the right. You need to select at least one required import field (indicated with a caret ^).
Required fields As you'll be importing this data back into your company file, you'll need to export at least one field type that has a caret ^ indicator. We recommend using the Co./Last Name field as it's easy to identify who the card belongs to.


Click Export. The Save As window appear.
- Specify where you want to save the file. To keep it simple, save the file to your desktop and leave the default file name (such as CUST.TXT).
- Click Save.
You can update your data in a spreadsheet or other software that can open a text file (such as Windows Notepad). The instructions below explain how to open the file in Microsoft Excel. If you need more information about how to open or update information in your editing software, see the help for that product.
- Open Microsoft Excel and go to File > Open.
- In the Files of type field, select All Files (*.*) and locate and open the exported text file. The Text Import Wizard appears.
- Step through the wizard and review the options. As your card file doesn't include any formulas or dates, you shouldn't need to make any changes.
- Click Finish. The data will be displayed and you can now edit the cells as required.
There's so much you can do in Excel, that we really can't guide you here. If you get stuck, see the Excel help. - When you finish editing, click Yes to the message to save it as a text file. You can only import text files into AccountRight.
- In your AccountRight company file, go to File > Import/Export Assistant. The Import and Export Assistant appears.
- Select Import data then click Next.
- In the Import field, select Cards and select the type of cards you're importing.
- Click Browse, locate the file to import and click Open. This will be the file you updated in Excel.
- Click Next. The Format step appears.
- If you didn't change the format options when exporting the file, you'll use the following options:
- Data is separated by: Tabs
- The first line of the file contains: Headers Or Labels
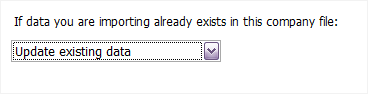
- If you've updated data that already exists in your company file, select the Update existing data option. This will update the existing records and add any new data.
- From the Match Cars using their list, select the field you want to match your existing cards to. You selected this field when creating your export file.

- Click Next. The Match Fields step appears.
- Match the fields in the import file to the fields in your company file.
If you haven't change the names of the fields or they match exactly, click Auto Match. AccountRight will automatically match all fields by name. If the field names don't match, click a field in the Import Fields panel on the left and then click the matching field in the Available fields panel on the right. Repeat this to match all fields you want to import.
- Click Next.
- Make a backup before you import. If things go wrong, you'll need to restore this backup.
- Click Import. Your data is imported and your records updated. If you have a large file, this could take some time.
- When the import is finished, An import log is created at the end of the import process. It's a text file that includes details of any issues with the import data. If get an error, see Import log topic for tips on how to fix issues.
 Yes
Yes
 No
No
 Thanks for your feedback.